Last week I implemented a lesson on earthquakes with my 5th grade class. I consider the lesson to be a success. The objectives were to learn about plates and the movements that create earthquakes. I used many different models throughout the lesson to help my students learn about these topics. I started the lesson off with a Brainpop video on Plate Tectonics to give students some basic background information. My school purchased a subscription for Brainpop and I find them to be great resources. The students find them very interesting and I find them as great lesson starters. Brainpop videos are great at taking difficult or complex concepts and present them in easy to understand kid friendly videos. This video was great model of plate movement. It had easy to understand animations of plate movement which we would later model in a hands on approach. After the video was over I started a discussion on the different types of movements along faults.
Once I felt my students had a good grasp of the types of movements, I then gave each student a piece of styrofoam. The pieces were of different shapes and sizes, similar to plates. Students then would push their "plate" against a classmates. We then discussed what they observed while pushing their plates against each other. By modeling the actions with the styrofoam the students were able to mimic the breaking of rocks and release of power associated with an earthquake. My students found this activity to be fun and informative. The styrofoam ened up being an excellent material. It would bend and build up pressure and then just snap, much like real rock along faults. The popping also added a fun little controlled explosion that added a touch of excitement to the activity that really engaged the students.
Overall, I would say the lesson was a great success. My students were able to explain what an earthquake was and what were the factors behind them. They also were able to learn a little bit about plate tectonics and the continental drift theory, thanks to the Brainpop lessons. This experience overall also helped to reaffirm the idea that models are great tools for teaching. They help bring visuals to a lesson that a book or lecture just cannot offer.
Sunday, October 14, 2012
Sunday, September 23, 2012
Helping Children Develop Humanitarian Ways
Natural disasters have the ability to be far reaching
events. They do not always just
affect the immediate area, but sometimes can have far-reaching and world-wide
impacts. These far reaching
affects are not always the results from that original disaster but could be
caused by all the lateral damage associated with it. Today is a very unique time for teaching children. With the wonders of the internet, we
can now see what is happening around the world at any time. With this access also brings a sense of
closeness to people around the world that previously was non-existent. In a world where people are now only as
far as a push of a button, it builds a sense that we are responsible for
helping these previously unknown people, especially in times of need.
One
way of teaching my students to become more scientifically-literate and also a
compassionate world citizen through the use of NASA’s Earth Observatory
website. http://earthobservatory.nasa.gov/Images/ This site is a great resource which can
lead to great lessons on different natural disasters. The website shows images of natural disasters around the
world taken with different types of imaging equipment. It shows all the current natural events
that are happening around the world.
By teaching my students about these current natural events, it would
hopefully build interest because it is an event that is currently
happening. These images could then
lead into lessons where students would learn the factors that contribute to
them. By using a variety of easily
found websites, such as the ones suggested in this week’s resources, students
can learn all about the actual science behind them.
And
due to the fact that these are events that are currently going on, the lesson
could also spin into a lesson on charity and fundraising. Students could help by raising money or
collecting supplies that could then be sent to areas of need. With the use of programs like Skype,
the teacher could set up contacts near or involved in the natural disaster
clean up and have video chats to learn about the after affects and how people
recover. Will all these wonderful
tools at our disposal now thanks to the Internet, it makes it easier to connect
our students right to the events that are changing our world. By connecting them to live real time
events, it hopefully builds a greater appreciation in the student to the
project/assignment. With that
instant connection also comes a great opportunity to learn about the natural
disasters around the Earth and provides an chance to help out with the
rebuilding effort.
Sunday, March 4, 2012
Evaluating Web 2.0 Presentation Tools
This week I decided to check out some of the many tools available for use in the classroom. I'm going to focus on two online programs that can be a great asset in the classroom.
The first tool I tested out was Prezi (http://prezi.com). Prezi is a nice tool for creating multimedia rich presentations. I was really amazed at how easy it was to set up a presentation. I have never used the program before the other day and it was very easy to set up a presentation. It has many different tutorials for every level of user. The tutorials also were very easy to understand and very informative, which is nice.
Prezi also allows for easy collaboration with others and the ability to share your presentations over the internet.
Another great thing was they offer a teacher and student account that gives you extra data storage over the normal free account. You could pay for an account for either $59 or $159 a year, but the free teacher account is equal to the $59 account. All you need is a school email account and you can register for the teacher/student account.
The next tool I'm going to discuss is Google Docs. Google Docs is another free program that allows you to share all types of files with collaborators around the world. You can create and share powerpoint type slideshows, word documents, spreadsheets, drawings and many other file types. I currently use Google Docs with my fellow teachers. The nice thing is how easy it is to share and collaborate on projects. I currently use it to share and edit lesson plans with my In-Class-Support teacher. It has a chat feature that allows you to discuss while you are working on your project, or in my case, lesson plans. It has come in very handy. I would say I still haven't used all the features it offers, but have been very satisfied with what I have been able to do with it so far. I would definitely recommend this site for any time you need to collaborate with others and can not do it in person. The ease of it is what sets it apart from other programs I've used in the past. Instead of email items to people, you can just open it up in your browser and see what your colleague is doing and go from there.
There are plenty of other wonderful tools out there but these were the two I like the best. For some more suggestions, check out these sites:
1) http://webtools4u2use.wikispaces.com/Presentation+Tools
2) http://edudemic.com/2010/07/the-35-best-web-2-0-classroom-tools-chosen-by-you/
3) http://cooltoolsforschools.wikispaces.com/Presentation+Tools
Sunday, December 11, 2011
21st Century Tools
The topic I decide to research as my “big idea” is the structure of atoms in different states of matter such as solids, liquids, gases and plasmas. This is a concept that students must learn which will help them understand concepts such as melting points, boiling points, pressure, conduction of electricity and sound waves just to name a few. I found many websites that provided students with access to lots of information about the topic as well as provided the students with simulators and other tools to help understand the concept. One of the better sites was http://ethemes.missouri.edu/themes/589. This site is great for students because all of the sites have been checked by the University of Missouri’s department of education for kid appropriate resources.
The links provided from the site let students access many videos and models of how the atomic structure changes when matter changes it states. This sites also are good at helping students gain a basic understanding of atomic structure and how things work by watching the videos from Brain Pop website, http://www.brainpop.com/science/matter/statesofmatter/.
One activity I can plan to help my students gain knowledge is to allow my students to use the website and its various resources by creating a webquest. I can have students go through the sites in search of answers that the students would be able to learn from the various sites linked to University of Missouri’s website. The webquest would have the students visit several sites and learn about how atoms interact with each other and how matter moves through the states of matter. This is a great activity to help build and increase the students' ability in researching topics using web resources as well as learning important information about atomic structure.
A challenge I can see arising from my use of a webquest would be students running into issues not being able to find the information on the websites. In the past, I have found that some students can have issues reading through websites and locating information. I think this issue can be reduced or fixed by grouping students in pairs so they both read through the websites and can help each other find the information needed to answer the questions. Also by working in groups, the students can discuss the topics with each other to help clarify the information for each other.
Sunday, November 27, 2011
Heat Transfer Guided Inquiry
 |
| Cups, with "HOT" water. |
This week I conducted an experiment to find out which material would insulate the mug of hot water the best. I decided to use tin foil, wax paper, plastic wrap and a t-shirt. The first three were materials I use in the kitchen and wanted to see which worked best for keeping something warm. I decided on the t-shirt just because I thought it would be interesting to see it's heat retention properties and we use it for clothing to stay warm. After putting hot water in identical mugs and then covering the mugs with the 4 materials as lids, I waited 30 minutes to then measure the temperature of the water inside. I then compared my before and after temperatures and determined the temperature changes. I ran three trials of my experiment before I was comfortable with my data's results. I wanted to verify my findings were right because my first trial produced interesting results.
 |
| Materials Used |
 |
| Predictions and data from first two trials. |
The t-shirt actually was the best in 2 of the 3 trials and had the best average temperature loss. It kept the water the hottest out of the 4 materials. I was very shocked because I thought it would be the worst of the all. After reading about heat transfer, I realized the reason the t-shirt worked the best because it had lots of spaces. Space is a poor conductor of heat because it increases the space that the molecules have to move to transfer the heat. It had lots of space and therefore was a poor conductor of heat, and trapped more heat inside than it let out.
 |
| Trial three's data and average temperature change chart |
I would like to run this experiment with liquids of different densities. I think if I used a thick gravy the results might have been different. Because the gravy is denser than the water, it would probably retain heat on its own better, and then the covers might not play as large of a role as they did in the water experiment. I would even try other materials like a hamburger or pasta. Again, maybe the density of the object would affect the outcomes.
Sunday, November 13, 2011
Pendulum Experiment

 The question I decided to investigate this
week was “Which pendulum will come to rest more quickly- a lighter pendulum or
heavier pendulum?” To investigate
this question I set up two pendulums of equal length (15 inches) but with
different sized washers. One
pendulum had a washer weighing 28 grams, the other had a washer weighing 2.8
grams. After conducting a few
trials, my results were exactly what I had predicted to happen, the lighter one
came to rest sooner than the heavier one.
This was a pretty easy experiment to conduct, there were not too many
things that could go wrong. I had
a few issues at first trying to get the pendulum to swing without hitting into
the desk it was hanging from, but after a few trials, I was able to get it to
swing in a semi-strait path without any contact with the desk.
The question I decided to investigate this
week was “Which pendulum will come to rest more quickly- a lighter pendulum or
heavier pendulum?” To investigate
this question I set up two pendulums of equal length (15 inches) but with
different sized washers. One
pendulum had a washer weighing 28 grams, the other had a washer weighing 2.8
grams. After conducting a few
trials, my results were exactly what I had predicted to happen, the lighter one
came to rest sooner than the heavier one.
This was a pretty easy experiment to conduct, there were not too many
things that could go wrong. I had
a few issues at first trying to get the pendulum to swing without hitting into
the desk it was hanging from, but after a few trials, I was able to get it to
swing in a semi-strait path without any contact with the desk.
 |
| Materials needed for the experiment, minus the vitamin water. |
Some things that I could change to this
experiment to get a different or modified result would be to change the
question to “Does the length of the pendulum affect the time it will take for a
pendulum to come to a rest?” This
would change the variable tested during the experiment from testing the weight
to testing the length of the strings used. I’m sure that with different variables would come different
results.

This experiment could easily be modified as a
lesson for my 5th grade class.
I could change the wording around to make it more engaging for my
students. Instead of using the
word pendulums, which I would then introduce to them after they conducted the
experiments, I could call it a swing experiment. I would pose the question as “Does the weight of the person
affect how long they will swing without being pushed?” We could then use the swings on
the playground to test out their hypothesis. I think by changing some vocabulary and making it relevant
to something they use in their free time during recess would make it more
engaging for my students. Also the
fact that we would be using swings on the playground would increase the fun and
interest level among my class. I
think that this would be a great way to teach the children about the affects
mass plays in momentum of objects, much like the pendulum experiment taught
me.
Wednesday, October 19, 2011
Structured Inquiry Lesson: Erosion
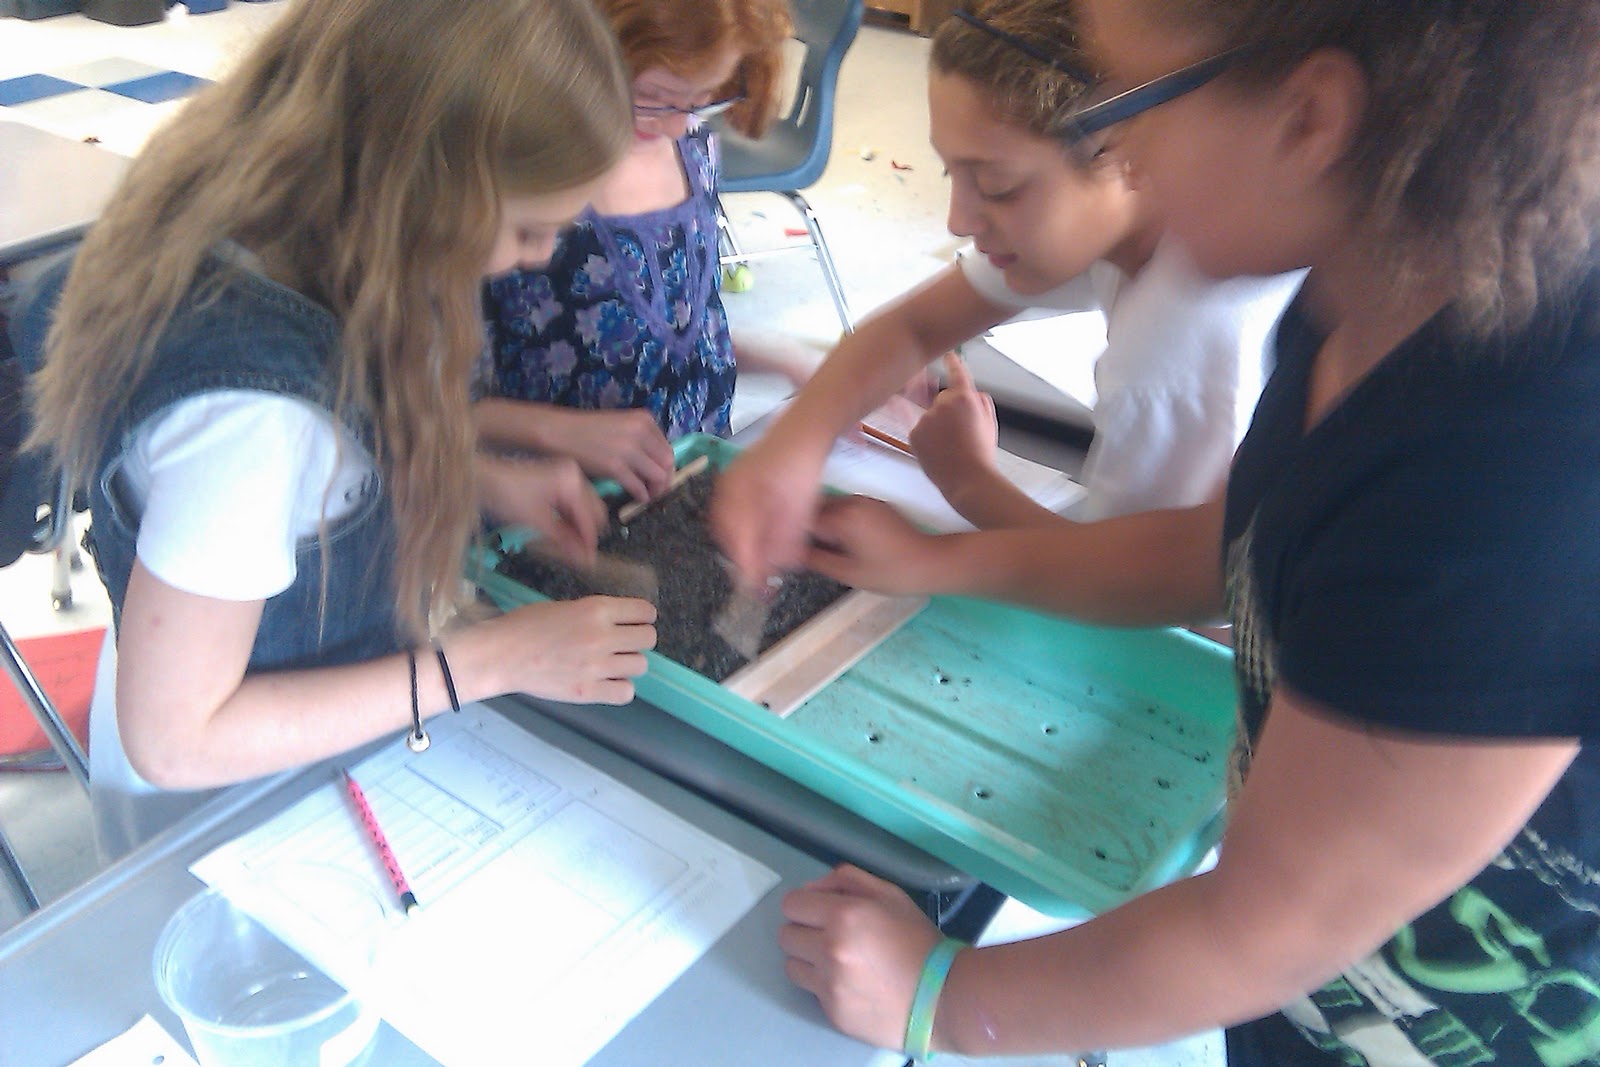
Last week I ran a structured inquiry lesson dealing with the variables that affect erosion. The students performed many different experiments to test the affects variables such as elevation, water volume and soil types play in the amount of erosion on landforms.

The students performed the experiments over a few days. Each group would record their data on observation sheets and make drawings of the results from running water through the stream tables. The students really loved the hands-on approach of the structured inquiry lesson. With the focus of the students doing the work and being active learners, I felt they took away more out of this lesson than any lesson I have done so far this year. There are usually some behavior problems but I saw all these bad behaviors disappear. I think with the onus being on the students to learn, they focused more than they usually do and really enjoyed the lesson.

(On Left)
Students running water through a soil and rock mixture to observe the affects of water erosion.

(On Right)
Students running water through a sand mixture.
As they performed the multiple activities, the students would record their observations on graphic organizers. I created the observation sheet below and the drawing organizer was from our FOSS science series.
Here are a few drawings from the students of their observations.


Here are some of the observations made by a student. As you can see from the notes that were recorded, this student was making connections and noticing differences between the different experiments that were performed. They even learned some new vocabulary terms such as porous, depression, canyon and delta.


 | |
| Students setting up stream tables. |
The students performed the experiments over a few days. Each group would record their data on observation sheets and make drawings of the results from running water through the stream tables. The students really loved the hands-on approach of the structured inquiry lesson. With the focus of the students doing the work and being active learners, I felt they took away more out of this lesson than any lesson I have done so far this year. There are usually some behavior problems but I saw all these bad behaviors disappear. I think with the onus being on the students to learn, they focused more than they usually do and really enjoyed the lesson.

(On Left)
Students running water through a soil and rock mixture to observe the affects of water erosion.

(On Right)
Students running water through a sand mixture.
As they performed the multiple activities, the students would record their observations on graphic organizers. I created the observation sheet below and the drawing organizer was from our FOSS science series.
Here are a few drawings from the students of their observations.


Here are some of the observations made by a student. As you can see from the notes that were recorded, this student was making connections and noticing differences between the different experiments that were performed. They even learned some new vocabulary terms such as porous, depression, canyon and delta.
Here is a student's essay summarizing his findings on the affects of the variables tested during experimenting. This student did a great job identifying the variables tested and explaining the affects they had during the erosion process. This was the original goal of the lesson, to identify the affects of different variables. While all of my students were not able to articulate their thoughts as well as this one, they all were able to understand that different situations are going to have different outcomes and they were able to identify which situations would cause the most and least amounts of erosion.
Subscribe to:
Posts (Atom)